How Long Does In-Office Teeth Whitening Take?
You scroll through before-and-after photos of dazzling transformations achieved in a single dental visit. The appeal of walking into a clinic with stained teeth and walking out an hour later with a noticeably brighter smile is potent. In-office whitening, often called chairside bleaching or power bleaching, is marketed as the ultimate express lane to a luminous smile. Yet, the precise time commitment remains a mystery to many patients. You are blocking out time from your work schedule and arranging logistics. You need more than a vague “about an hour.”
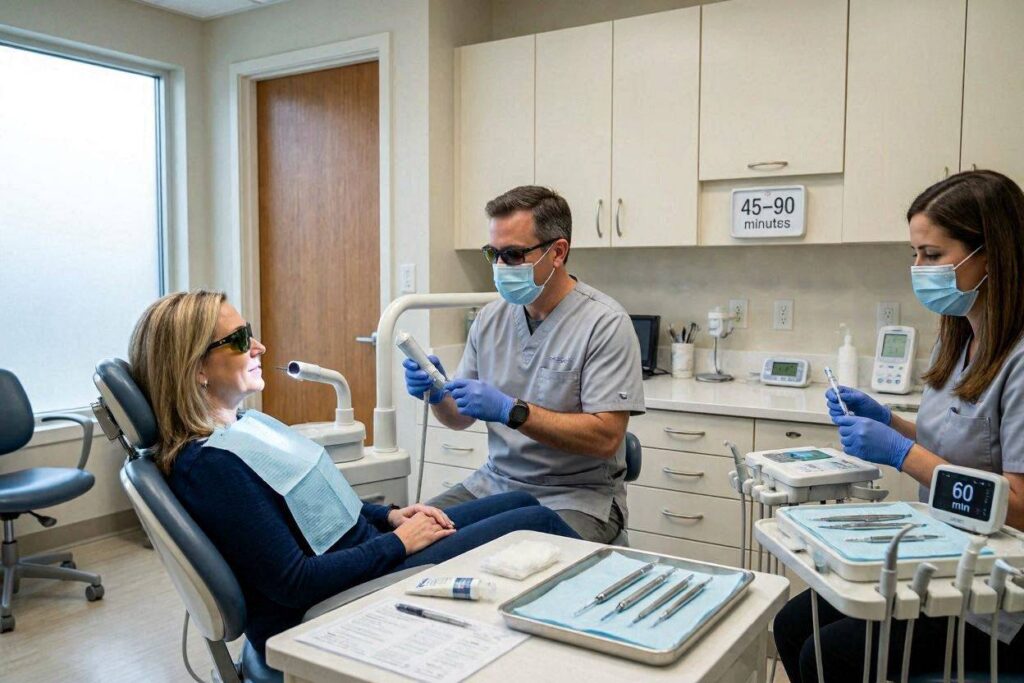
So, precisely how long does in-office teeth whitening take? The core procedure—the actual application of peroxide gel and activation light—typically spans 60 to 90 minutes of chair time. However, the full appointment from check-in to walking out the door often extends to 1.5 to 2 hours when you include the necessary pre-procedural photography, shade analysis, gingival protection, and post-procedural desensitization. This guide deconstructs the appointment minute-by-minute, so you arrive informed and prepared, with zero anxiety about the ticking clock.
The Pre-Procedural Phase: Setting the Baseline (15-25 Minutes)
Your whitening appointment does not begin with the whitening gel. It begins with documentation and biological preparation. Skipping or rushing this phase compromises safety and aesthetic outcome.
Medical History and Consent:
Even if you are a long-time patient, the dental team will confirm your medical history, specifically checking for pregnancy, nursing, or recent oral surgeries. You will sign a consent form acknowledging that existing restorations (crowns, fillings, veneers) will not whiten and may need replacement after the procedure to match the new natural tooth shade.
Shade Assessment and Photography:
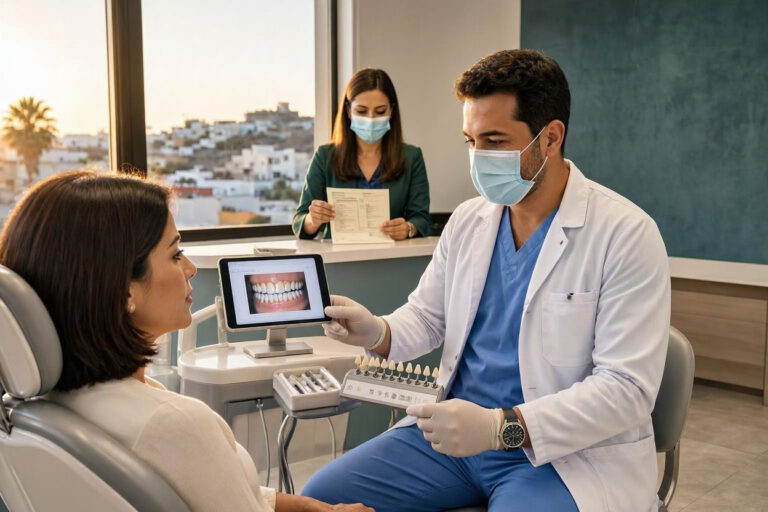
A dental assistant or the dentist will use a standardized shade guide (such as the Vita Classical or Bleachedguide 3D-Master) to record your current starting shade under calibrated, neutral lighting. They will photograph your teeth from multiple angles with a digital SLR camera and polarizing filters to eliminate glare. These photographs serve as the objective, medicolegal record of the “before” state. This step alone can take 10 minutes. Without it, you cannot accurately measure the success of the procedure.
Prophylaxis (Cleaning):
The dentist needs the enamel surface pristine and free of the acquired pellicle. They will use a non-fluoridated prophylaxis paste (typically pumice-free, to avoid scratching) in a slow-speed handpiece to polish every facial surface. They might also use a micro-etcher gently if there are stubborn surface stains. This takes roughly 5 minutes.
Lip and Cheek Retraction:
Now the clinical setup begins. The team will place a rigid plastic cheek retractor to keep your lips and cheeks completely away from the teeth. They will place cotton rolls or a dry-angle suction device in the vestibules (the space between gums and cheek) to control saliva flow. Any moisture contamination during the procedure dilutes the peroxide and can cause gingival wicking, leading to burns. This isolation process, including seating the retractor comfortably, takes another 5 minutes.
The Gingival Barrier Application: The Most Critical Step (10-15 Minutes)
Before a single drop of high-concentration peroxide touches your teeth, the soft tissues must be sealed away. In-office gels can contain 25% to 40% hydrogen peroxide. This concentration causes an instant, painful chemical burn and white sloughing if it contacts the gingiva.
The Gingival Dam:
The dentist will apply a light-cured, resin-based barrier material (often a flowable methacrylate composite, such as OpalDam or a similar product) directly onto the gum tissue collar surrounding each tooth. They meticulously paint a continuous 2-3mm band of this pink or blue gel and then cure it with a bright LED light for 10-20 seconds per segment. The barrier transforms into a solid, flexible rubbery seal that physically isolates the teeth from the gums.
This step is slow, painstaking, and cannot be rushed. The dentist will often use an explorer probe to check the seal at every margin, ensuring no leakage points. Rushing the gingival barrier is the most common cause of post-operative pain. Expect 10 to 15 minutes of the appointment to be dedicated entirely to this gingival “armoring.”
The Active Whitening Cycle: The Main Event (40-60 Minutes)
Now, the actual whitening chemistry begins. The protocol varies by the specific system the dentist uses (Zoom, KöR, Pola, Venus White, etc.), but the core structure is consistent: iterative cycles of gel application, activation, and removal.
First Gel Application:
The dentist or assistant will mix or syringe the high-concentration hydrogen peroxide gel directly onto the facial surface of the teeth. The gel is often a thick, colored formulation (sometimes red or blue to aid visibility) and will be spread evenly to a depth of 1-2mm. The application itself takes about 3 minutes.
Activation Phase (Light/Laser):
Many, though not all, in-office systems use an activation light, commonly an LED, plasma arc, or halogen curing lamp. Some systems claim the light accelerates the chemical decomposition of peroxide via photocatalysis or thermal energy, releasing a burst of free radicals. Other evidence-based clinicians argue the light’s primary role is thermal (warming the gel to speed the reaction kinetics) and that the same final shade can be achieved with longer chemical contact alone.
Regardless, if a light is used, it will be positioned directly in front of your teeth at a specific distance. You and the staff will wear protective orange or yellow-filtered eyewear. A single activation cycle lasts 15 to 20 minutes. During this period, you simply sit still. You may feel a slight warmth, but typically no sharp pain.
Cycle Repetition:
At the end of the 15-minute cycle, the gel, now exhausted and frothy, is suctioned off thoroughly. The teeth are rinsed and briefly dried. The shade progression may be assessed. Fresh gel is then applied, and the cycle repeats. Most protocols call for 2 to 4 cycles. A typical session involves three cycles of 15 minutes each, totaling 45 minutes of active bleaching time. Some newer rapid-protocol systems use a single 30-minute application of a continuously replenished gel.
Between cycles, you may be asked to swallow and reposition your head. The suction is loud, and your lips will feel dry from the retractor, but the assistant will frequently apply moisture to your lips to prevent cracking.
Post-Whitening Rinse and Desensitization (10-15 Minutes)
Once the final cycle is complete and the dentist is satisfied with the shade shift, the active phase ends. But you are not yet ready to leave.
Barrier and Gel Removal:
The thick gel is suctioned and rinsed away meticulously. The gingival dam is peeled off gently. The teeth are sprayed with copious water to remove all chemical residue. The retractor is removed, and you can close your mouth for the first time in over an hour. Your jaw will feel stiff.
Immediate Desensitization Protocol:
The dentinal nerves are now hyperactive. Before you leave the chair, the dentist must seal the tubules and calm the pulp. They will apply a fluoride varnish or a glutaraldehyde-based desensitizer (like GLUMA) directly to the facial surfaces of the teeth. Some clinicians apply a thick layer of amorphous calcium phosphate (ACP) or casein phosphopeptide-amorphous calcium phosphate (CPP-ACP) paste (like MI Paste) and let it sit for 5 minutes. This remineralization bath is a critical protective measure that dramatically reduces post-operative zingers.
Final Shade Photography:
The dentist will take the “after” photographs using the exact same lighting and shade guide as the “before” shots. You will see the visual evidence of the transformation. You will typically observe a shade jump of 5 to 8 tabs on the Vita scale, though dehydration temporarily exaggerates the true whiteness.
The Dehydration Effect: Why You Look Even Whiter Immediately
A critical element of the time-spent discussion is the optical illusion created by the procedure itself. After an hour of isolation, air drying, and chemical oxidation, your enamel is profoundly dehydrated. Dehydrated enamel scatters light differently and appears chalky, opaque, and stark white—often referred to as the “bleached-chalk” effect. This immediate post-op shade is not your final, stable color.
Over the following 48 to 72 hours, the enamel rehydrates with salivary fluids. The color will “settle” and drop back by approximately 1 to 2 shade tabs. A tooth that looked like a B1 (the whitest on the Bleachedguide) immediately after the procedure may stabilize at a natural-looking A1 or B2. This is normal physiology, not a failure of the treatment. Your 90-minute appointment delivers the maximum dehydrated aesthetic peak, and nature modulates it down to a stable, hydrated, realistic white over the next two days.
Total Appointment Duration Summary Table
| Procedure Step | Estimated Time (Minutes) | Key Actions |
|---|---|---|
| Check-in and consent | 5 mins | Paperwork, medical history confirmation |
| Shade assessment and photos | 10 mins | Standardized Vita shade, digital photography |
| Oral prophylaxis | 5 mins | Pumice-free polishing, pellicle removal |
| Lip retraction and isolation | 5 mins | Cheek retractor, cotton rolls, dry angles |
| Gingival barrier application | 15 mins | Resin dam applied and light-cured per tooth |
| 3 x 15-min whitening cycles | 45 mins | High-conc. H2O2 applied, LED light activation |
| Gel and dam removal | 5 mins | Suction, rinse, barrier peel-off |
| Desensitizing treatment | 10 mins | Fluoride varnish, ACP paste, GLUMA |
| Final photos and instructions | 5 mins | Post-op shade photo, home care briefing |
| Total Chair Time | Approx. 105 mins | ~1 hour 45 minutes |
Does the Light Really Add Time, or Just Value?
A controversial but time-relevant debate in cosmetic dentistry is whether LED or laser activation shortens the total appointment time. The manufacturers of light-based systems claim that the photo-activation allows you to achieve a greater shade change in fewer, shorter cycles. A non-light, traditional “slow and low” chemical-approach dentist might leave the gel on for 30 minutes per cycle and do two cycles, resulting in a similar total appointment length of 60-90 minutes.
From a patient-time perspective, the difference is often negligible. The light system might involve three 15-minute cycles; the non-light system might involve two 30-minute cycles. The total chair time often converges to the same window. The speed advantage of the light is more theoretical than practical for the patient in real-world clock minutes. Do not choose a provider based solely on the claim of a “faster laser.” Choose based on their protocol for managing sensitivity and their meticulousness with the gingival barrier.
Conclusion
- A complete in-office teeth whitening appointment realistically occupies 1.5 to 2 hours of your day, with the active peroxide application and light activation cycles accounting for approximately 45 minutes of that time and the remaining duration consumed by essential safety and documentation steps.
- The gingival barrier application (10-15 minutes) and the post-whitening desensitization treatment (10 minutes) are non-negotiable time investments that prevent chemical burns and severe post-operative dental nerve pain, respectively.
- Immediate post-procedure whiteness is artificially enhanced by temporary enamel dehydration; the stable, true hydrated shade settles 48 to 72 hours later, so the appointment time yields a result that matures into its final appearance, not just a single fixed moment of dazzle.
Frequently Asked Questions
Can I eat immediately after the 90-minute appointment?
You can eat, but you must adhere to a strict “White Diet” for the next 48 hours. This means avoiding any pigmented foods or drinks (coffee, red wine, berries, soy sauce, beets) because the enamel surface is temporarily porous and highly susceptible to rapid re-staining as it rehydrates.
How many in-office sessions will I need for severely stained teeth?
One session achieves significant lightening for most individuals. For severe tetracycline staining or deep intrinsic grey discoloration, the dentist may recommend two separate appointments spaced one to two weeks apart, each session lasting the standard 90 minutes. They will not perform back-to-back multi-hour sessions due to the pulpal inflammatory risk.
Why does the gingival barrier take so long?
Each tooth’s gum collar must be individually sealed with a light-cured resin. The cure takes 10-20 seconds per interdental papilla. With 12-14 teeth exposed, the cumulative cure time plus the meticulous application accounts for the 15-minute duration. Any tiny gap causes immediate, sharp pain when 35% peroxide contacts the tissue.
Does the in-office whitening time include the consultation?
No. A separate consultation appointment often precedes the whitening appointment by a week or two. The dentist needs to check for caries, leaky fillings, cracks, and gum recession before clearing you for chairside bleaching. The consultation is an additional 30-minute visit.
Can I leave if I feel sensitivity during the 15-minute cycle?
Yes, you must communicate this immediately. The dentist can stop the cycle, suction the gel off, and apply desensitizer. Some protocols allow for a “pause and resume” approach after a brief cooling-off period. Never suffer in silence assuming the pain is part of the process.
Additional Resource:
For a comprehensive patient guide on the safety and effectiveness of professional chairside whitening, visit the American Academy of Cosmetic Dentistry’s resource page. <a href=”https://www.aacd.com/whitening” target=”_blank” rel=”noopener noreferrer”>AACD: Teeth Whitening</a>
Disclaimer: This article is for informational and educational purposes only and does not constitute medical or dental advice. Appointment durations and protocols vary between dental practices and specific in-office whitening systems. You should consult directly with your chosen dental professional to understand their specific procedure timeline and confirm your candidacy for chairside whitening.
continue
Meta Description: Baking soda whitening is a popular DIY method, but is it safe for your enamel? We analyze the abrasivity, pH effects, and clinical data to reveal the truth about brushing with sodium bicarbonate.
Is Whitening Your Teeth with Baking Soda Safe?
The quest for a brighter smile often begins not at the dentist’s office, but in the kitchen pantry. Baking soda, or sodium bicarbonate, has held a revered place in folk dental care for generations. It is cheap, ubiquitous, and carries an aura of natural purity that commercial toothpastes, with their long chemical names, seem to lack. Countless blog posts and viral videos promise that a simple paste of baking soda and water, or even a direct sprinkle on a wet toothbrush, can lift years of coffee and wine stains gently and safely.
But the question lingers: is whitening your teeth with baking soda actually safe, or is this a case of “natural” being synonymous with “harmful”? The nuanced truth is that baking soda is safe for enamel when used correctly, in appropriate concentrations, and at a non-excessive frequency, but it can cause significant dental abrasion and gum irritation when misused with aggressive brushing or overly concentrated pastes. This article will dissect the physics of abrasion, the chemistry of bicarbonate, and the clinical studies to define exactly where the line between safe, effective whitening and irreversible tooth wear lies. We will strip away the mythology and provide a realistic, evidence-based protocol for those who choose this low-cost method.
The Mechanism: Baking Soda Does Not Bleach—It Scrubs
The most fundamental misunderstanding about baking soda whitening is the mechanism. Many people assume that because the powder is white, it contains a bleaching agent that chemically decolorizes stains. This is false. Baking soda is sodium bicarbonate (NaHCO₃). It contains no hydrogen peroxide, no carbamide peroxide, and no oxidizing free radicals. It cannot chemically alter the double bonds of chromophore molecules deep within the dentin.
Baking soda whitens teeth through a purely mechanical, low-grade abrasive action. Imagine a microscopic, gentle sandblasting of the tooth surface. The sodium bicarbonate crystals are angular but significantly softer than the hydrated silica abrasives found in many commercial whitening toothpastes. On the Mohs hardness scale, dentin measures around 3.0 to 4.0, and enamel measures a robust 5.0. Sodium bicarbonate crystals measure approximately 2.5. This means that pure baking soda is physically softer than the tooth structure it is scrubbing against.
Because the abrasive particles are softer than enamel, they selectively abrade the soft, sticky, pigmented biofilm (the acquired pellicle) and extrinsic surface stains without cutting into the underlying mineralized enamel prism. It’s comparable to cleaning a non-stick pan with a plastic scrubbing pad rather than a steel wool scourer. The stain is physically wiped away, revealing the inherently whiter, unstained enamel underneath. The tooth is not made fundamentally lighter in intrinsic color; it is simply restored to its baseline clean state.
The Abrasivity Index: Understanding RDA and REA Values
To assess safety objectively, dental researchers use standardized abrasivity measurements. The Relative Dentin Abrasivity (RDA) scale, established by the American Dental Association, measures how much a substance erodes dentin under controlled laboratory conditions. The ISO standard states that toothpastes must have an RDA below 250 to be considered safe for long-term daily use.
Pure baking soda has a surprisingly low RDA, typically measured at around 7 to 12. For context, many common “whitening” toothpastes containing hydrated silica have RDA values in the 80 to 150 range. Some “smoker’s” toothpastes exceed 160. This numerical data seems to suggest that baking soda is dramatically safer than almost any commercial toothpaste. However, RDA is measured with a standardized slurry. The danger of home use is that individuals rarely use a standardized slurry. They use a paste with variable water content, often applying pure, undiluted powder directly to a wet brush, creating a highly concentrated, thick, gritty paste that has a much higher effective abrasivity in the localized area of application.
Furthermore, the Relative Enamel Abrasivity (REA) test focuses on enamel wear. Sodium bicarbonate demonstrates low enamel abrasion at neutral pH. The real risk emerges from the user’s brushing force and technique. The abrasivity of a toothpaste is not just a property of the powder; it is a function of the powder plus the pressure exerted by the hand and the stiffness of the brush bristles. A low-RDA powder like baking soda, when combined with a hard-bristled toothbrush and vigorous horizontal scrubbing for two minutes, can generate a cumulative micro-abrasive wear rate comparable to a high-RDA paste used gently. Safety is technique-dependent.
The pH Factor: Alkaline Benefit and the Critical Balance
While baking soda does not bleach chemically, it does exert a potent chemical influence on the oral environment through its pH. Sodium bicarbonate is alkaline, with a pH of approximately 8.3 when dissolved in water. The oral cavity after a meal, especially after consuming acidic drinks or sugary foods, becomes a hostile acidic environment. The critical pH for enamel demineralization is 5.5. Below this threshold, hydroxyapatite crystals begin to dissolve.
Applying an alkaline baking soda slurry to the teeth creates an immediate buffering effect. The bicarbonate ions neutralize the hydrogen ions of the plaque acids, raising the oral pH into a safe, neutral zone within minutes. This rapid neutralization halts the acid-driven demineralization of enamel. Additionally, an alkaline environment discourages the proliferation of aciduric bacteria such as Streptococcus mutans, the primary architect of dental caries.
This alkalinity, however, also poses a risk if pushed to an extreme. The oral mucosa and gingiva are not adapted to prolonged high-pH environments. A thick paste of baking soda left sitting on the gum line for an extended period (as some misguided “masking” techniques suggest) can cause a mild alkaline chemical burn to the delicate gingival epithelium. The tissue turns white and sloughs off, mimicking a hydrogen peroxide burn, though the mechanism is caustic alkalinity rather than oxidation. Rinsing thoroughly after brushing neutralizes this risk entirely.
Clinical Evidence: What Studies Actually Show
The body of dental literature on baking soda is extensive and largely positive when examining commercially formulated bicarbonate toothpastes. A 2017 systematic review published in the Journal of the American Dental Association analyzed multiple randomized controlled trials and concluded that dentifrices containing baking soda were significantly more effective at removing plaque and reducing gingival inflammation than non-bicarbonate control pastes. The studies consistently found no significant increase in enamel wear with the formulated products, attributable to the controlled particle size and slurry consistency.
However, the evidence specifically on raw, kitchen-grade baking soda used as a DIY powder is less robust and reveals the practice’s double-edged nature. A study in the Journal of Clinical Dentistry measured dentin abrasion with pure sodium bicarbonate powder versus a formulated bicarbonate toothpaste. The pure powder, when mixed with water in an unstandardized, user-mixed paste, produced significantly higher dentin wear than the commercial product. The irregular, uncontrolled particle clumping in the home-mixed paste created “hot spots” of concentrated abrasive force. The same chemical compound, applied in a different physical form, produced a different safety profile. The takeaway from the literature is clear: the chemical substance sodium bicarbonate is safe; the physical application method determines whether the treatment is safe or destructive.
Common Misuse Scenarios That Compromise Safety
Understanding the theoretical safety of baking soda is less important than understanding how real-world habits turn a safe substance into a dangerous one. The following misuse patterns are clinically documented sources of dental damage.
The Undiluted Scrub:
The most destructive practice is dipping a wet toothbrush directly into the baking soda box, picking up a heavy, pasty clump of pure powder, and scrubbing aggressively. This creates a highly viscous, low-water-content slurry where the sodium bicarbonate crystals do not dissolve sufficiently. The concentrated, dry, angular particles gouge the enamel surface, creating microscopic striations that scatter light and make the tooth appear dull over time, paradoxically undoing the whitening effect.
The Acid-Base Volcanic Reaction:
A trendy but disastrous method involves mixing baking soda with an acidic liquid—lemon juice, apple cider vinegar, or strawberry puree—to create a fizzing, bubbling paste. Users assume this effervescence enhances cleaning. It does exactly the opposite. The acid instantly dissolves the baking soda into sodium ions and carbon dioxide gas, completely eliminating the useful mild abrasive. The user is left scrubbing their enamel with a highly acidic, demineralized liquid. The enamel surface is chemically softened by the acid and then mechanically ground away by any undissolved powder remnants. This combination rapidly causes irreversible enamel erosion.
Excessive Frequency:
Even a perfectly mixed, gentle baking soda paste used daily for multiple weeks without a break will eventually create a cumulative wear problem. The enamel never gets a chance to remineralize fully under a stable salivary pellicle. The constant daily abrasion, even if mild per session, prevents the maturation of the acquired pellicle and slowly polishes away the outermost micron of enamel. A safe protocol demands cycling: a few days of use, followed by a rest period, not a permanent replacement for standard toothpaste.
The Desiccating Effect on Gums and Mucosa
A frequently overlooked safety consideration is the effect of baking soda on the soft tissues. Sodium bicarbonate is a salt. Salts are hygroscopic; they draw water out of cells via osmosis. When you apply a hypertonic baking soda paste to the gum line, it extracts intracellular fluid from the delicate non-keratinized sulcular epithelium and the alveolar mucosa. This causes a temporary but uncomfortable desiccation. The tissue feels dry, tight, and may peel slightly.
For patients with pre-existing dry mouth (xerostomia) or those taking medications that reduce salivary flow, this osmotic desiccation exacerbates their underlying condition. The lack of saliva, combined with the salt drying effect, creates a mouth environment with a higher risk of friction ulcers and an impaired ability to buffer acids after the baking soda has been rinsed away. In such patients, a baking soda paste is relatively contraindicated, or must be followed by an immediate, prolonged water rinse and possibly the application of a moisturizing oral gel.
Safe Protocol: Using Baking Soda Without Damaging Enamel
Baking soda whitening can be safely incorporated into an oral hygiene routine, but it requires a disciplined, informed protocol that departs significantly from casual internet advice.
Step 1: The Slurry Consistency Is Everything:
Do not use dry powder. Mix a very small amount—a quarter of a teaspoon—with enough water to create a thin, watery, almost milk-like slurry. The goal is to dissolve as many of the crystals as possible. A thin slurry spreads across the brush surface and gums evenly, delivering low-concentration bicarbonate ions and minimal localized abrasive pressure. If the mixture feels gritty between your fingers, add more water until it feels silky and smooth.
Step 2: Use an Ultra-Soft Brush:
Pair the baking soda slurry with the softest toothbrush available, such as a post-surgical or pediatric brush with ultra-fine, flexible nylon bristles. The brush should do the foaming and distribution; the liquid slurry does the stain removal. Press with a force equivalent to the weight of the brush handle resting on a kitchen scale: approximately 150 grams, no more.
Step 3: Limit Duration and Confine the Zone:
Do not perform a full-mouth scrub. Focus on the facial surfaces of the anterior six teeth—the “smile zone.” Spend 20-30 seconds total on these surfaces using small, circular, gentle motions. Do not scrub the occlusal (biting) surfaces or the lingual (back) surfaces of the teeth with baking soda. These areas are either at high risk for abrasive wear (cusps) or do not contribute to aesthetics.
Step 4: Immediate and Thorough Rinse:
Rinse vigorously with plain water for at least 15 seconds to remove all bicarbonate residue and re-establish a neutral isotonic environment for the gums. Follow the water rinse with a fluoride or hydroxyapatite-containing mouthwash to kickstart the remineralization process on the freshly cleaned surfaces.
Step 5: Cycle the Treatment:
Use this protocol no more than twice per week. On other days, brush with a standard low-abrasive fluoride toothpaste. The baking soda sessions act as a periodic extrinsic stain “reset,” while the daily toothpaste maintains fluoride protection and gum health without the cumulative abrasion risk.
Baking Soda vs. Other Abrasive “Natural” Whitening Agents
To make an informed safety choice, we must compare baking soda against its chief natural competitors: charcoal and clay powders. A comparative analysis reveals why baking soda is the least dangerous option in the abrasive category, even though none of them are ideal.
Activated Charcoal:
Charcoal powders have an RDA that can range from 90 to over 200 depending on the wood source and grind size. Charcoal particles are irregular, sharp, and physically harder than dentin. They score enamel aggressively, creating deep grooves that permanently trap stain. Charcoal also adsorbs fluoride ions, potentially rendering subsequent fluoride treatments less effective. Baking soda is demonstrably safer than charcoal by any mechanical metric.
Bentonite or Kaolin Clay:
Clay-based tooth powders are marketed as “mineralizing” but their abrasive index is highly unpredictable and unregulated. The fine plate-like clay particles can become impacted in the gingival sulcus, causing localized inflammation. Baking soda, because it completely dissolves into soluble sodium and bicarbonate ions, leaves no particulate residue in the soft tissue crevice. It is a cleaner, more predictable agent.
Whitening Toothpaste (Silica):
As noted, many commercial whitening pastes have an RDA between 100 and 150. Baking soda, when mixed correctly into a thin slurry, has an effective localized RDA well below 50. The commercial paste’s advantage is its standardized, controlled delivery matrix, but chemically, the softer bicarbonate particles are inherently less scratchy.
Comparative Table: Baking Soda vs. Charcoal vs. Peroxide
| Parameter | Baking Soda (Sodium Bicarbonate) | Activated Charcoal | Hydrogen Peroxide |
|---|---|---|---|
| Primary Mechanism | Low-grade mechanical abrasion; pH buffering | High-grade mechanical abrasion; adsorption | Chemical oxidation of stain bonds |
| Hardness (Mohs) | ~2.5 (softer than enamel) | Variable; some hardwood chars exceed 5 (enamel is 5) | Liquid; zero mechanical abrasion |
| Enamel Wear Risk | Low (in thin slurry); High (in dry paste) | High to Extreme; irreversible scoring | None (structural); transient micro-roughness |
| Effect on Oral pH | Alkaline (neutralizes acid) | Often neutral or slightly acidic | Slightly acidic (if unbuffered); neutral if buffered |
| Depth of Whitening | Superficial extrinsic stain removal only | Superficial stain removal only | Deep intrinsic stain oxidation |
| Gingival Safety | Osmotic desiccation if concentrated | Particles embed in sulcus; tattoo-like staining | Chemical burn if high concentration contacts tissue |
Conclusion
- Baking soda is safe for whitening teeth when mixed into a thin, watery slurry and used with an ultra-soft brush in a brief, targeted session no more than twice a week; its low Mohs hardness (2.5) means it selectively scrubs away soft extrinsic stain without gouging the harder enamel.
- The primary safety risks arise from user misuse—dry powder scrubbing, combining with acidic liquids like lemon juice, or daily aggressive brushing—which transform the gentle abrasive into an enamel-wearing, gum-desiccating hazard.
- As a non-oxidative agent, baking soda only removes surface biofilm to reveal the natural baseline shade; it cannot chemically bleach deep intrinsic dentin stains, making it a safe but limited maintenance tool rather than a true whitening solution.
Frequently Asked Questions
Can I mix baking soda with my regular toothpaste to make it safer?
Yes, this is a sound practice. A pea-sized drop of toothpaste mixed with a tiny pinch of baking soda creates a buffered, foamy paste that retains fluoride and uses the toothpaste’s surfactant system for even distribution. The toothpaste base dilutes the baking soda concentration, mitigating the risk of localized heavy abrasion.
Does baking soda damage dental bonding or veneers?
Yes, it can. Composite resin bonding and porcelain veneers have surface glazes that are softer than enamel. The micro-abrasive effect of baking soda, even in a thin slurry, can dull the gloss finish of anterior restorations over time, leading to a matte appearance that traps stain more readily. Avoid baking soda directly on cosmetic bonding.
My teeth feel sensitive after using baking soda. Is this enamel loss?
Probably not, if you used it only a few times. More likely, the thorough cleaning removed the protective biofilm layer, and the alkaline osmotic shift temporarily irritated the dentinal tubules. If the sensitivity persists for days, you may have abraded the cementum at the gum line. Discontinue use and switch to a potassium nitrate desensitizing toothpaste.
Is baking soda safe for children’s teeth?
Generally, no. Primary (baby) teeth have a thinner enamel layer than permanent teeth. The abrasive margin of safety is narrower. Furthermore, children may not have the motor control to limit brushing force and time. Baking soda whitening protocols are designed for fully erupted permanent dentition in adults.
Why does baking soda taste salty and unpleasant, and can I add something for flavor?
The salty taste is inherent to the sodium salt. Adding a flavoring agent like essential oil (peppermint) is acceptable in micro-drops, but never add acidic flavor enhancers or glycerin-based extracts that change the slurry’s water content and make it thicker and more abrasive.