How Dentists Do a Filling on a Child
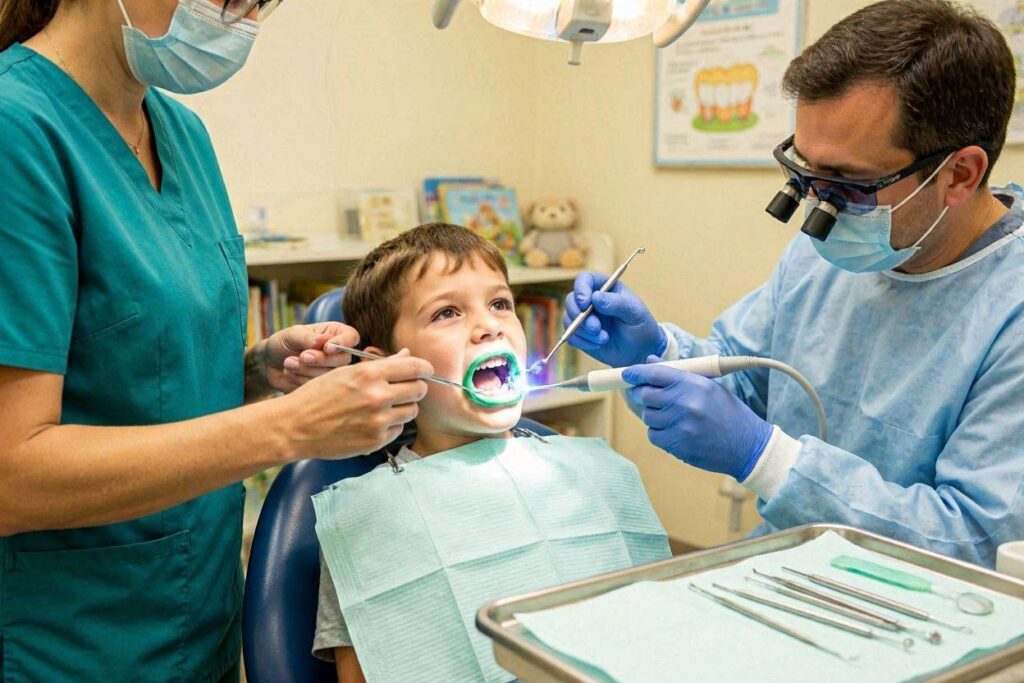
A trip to the dentist for a filling can be a cloud of anxiety for a parent. Your mind might be filled with your own childhood memories of whining drills and strange sensations. You worry about your child’s comfort, their cooperation, and the long-term health of their tiny teeth. But pediatric dentistry has undergone a quiet, compassionate revolution. The process today is faster, gentler, and built around the child’s psychological and physical comfort. The small cavities that appear in baby teeth, often called early childhood caries, need swift, effective treatment. Baby teeth are the essential placeholders for permanent teeth, guiding them into their correct positions. Losing a baby tooth too early to decay can lead to a chain reaction of orthodontic problems later. Understanding exactly how a dentist places a filling in a child’s tooth transforms this event from a scary unknown into a predictable, manageable routine. This guide walks you through every single step, explaining the “why” behind each action, the tools used, and the language your child might hear, so you can prepare yourself and your little one for a calm, successful visit.
The Shift in Pediatric Filling Philosophy
Decades ago, a child’s cavity was often met with a sense of grim inevitability—a noisy drill and a stern instruction to “hold still.” Modern pediatric dentistry is built on a triad of prevention, minimally invasive techniques, and behavioral guidance. The goal is no longer just to “drill and fill.” It is to nurture a positive, trusting relationship between the child and oral health care that will last a lifetime. This shift means the actual filling procedure is surrounded by layers of comfort and communication. Dentists who work exclusively with children have advanced training not only in tiny dental anatomy but in child psychology. They understand the power of the “tell-show-do” method: explaining a procedure in simple, non-threatening terms, showing the instrument on a finger first, and only then performing the task in the mouth. The pace is deliberate. The language is chosen with care—there is no “shot,” only “sleepy juice for your tooth.” This foundational philosophy means the success of the filling is measured not just by the perfect seal of the material but by the child walking out of the operatory feeling brave, respected, and unafraid.
Initial Communication and Behavioral Preparation
The appointment begins not with a tool but with a conversation. The dentist or hygienist will greet your child at their eye level, often sitting on a small stool so they do not tower over them. They will use a gentle, cheerful voice to explain the “sugar bug” that needs to be removed so the tooth can be strong again. This initial phase is for building rapport and trust. The dentist will show the child the “Mr. Thirsty” suction straw, the “tooth shower” (the water spray), and the “tooth mirror” to look at their smile. Each tool is demonstrated harmlessly—perhaps the slow-speed polishing brush is run on a fingernail so the child feels the tickle without the threat of it being inside the mouth first. This is the “tell” and “show” phase. The dentist is constantly watching the child for signs of fear or readiness. If a child is particularly anxious, this phase might be extended over a longer period, or the dentist might decide to use nitrous oxide, commonly called laughing gas, to help the child achieve a relaxed, floaty state of well-being before any anesthesia is even discussed. Your role as a parent in the room is to be a silent, calm, and reassuring presence. A simple hand on the ankle or a warm smile when your child glances your way is powerful. Let the dentist be the narrator; too many voices can overwhelm a child.
The Numbing Process: A First, Painless Step
For many parents, the local anesthetic injection is the most feared part. Yet, for a skilled pediatric dentist, this step is often the most seamless. The process is layered to ensure the actual pinch is never felt.
Topical Anesthesia: The Pre-Numbing Gel
First, a small cotton roll or Q-tip is used to dry the gum tissue in the area of the cavity. Dryness is critical for the next step to work. A flavored topical anesthetic gel, typically benzocaine or lidocaine in a pleasant-tasting base like strawberry or bubblegum, is then applied to the dried gum with a Q-tip. It stays there for one to two minutes. This gel anesthetizes the surface nerve endings of the mucosa. The child feels a tingling or a weird “fat lip” sensation, but no pain. The dentist will often tell the child, “I am putting some strawberry jelly on your gum to help it go to sleep.”
The Local Anesthetic Injection: The Slow Delivery
With the surface tissue fully numbed, the actual injection occurs. The dentist will pull the child’s cheek or lip taut, not only for visibility but because the tension of the tissue helps distract the nerve fibers. A very fine-gauge needle is used. The dentist does not simply push the anesthetic in quickly. They deposit it slowly, at a rate of about one milliliter per minute. Fast injection is what causes the burning sensation and tissue damage from rapid expansion. A slow, controlled deposit is almost imperceptible. The dentist will often wiggle the cheek or lip while injecting, a simple physical distraction that overloads the sensory nerves so the signal from the needle is lost in the noise. Within a minute or two, the child’s tooth, lip, and tongue will begin to feel heavy, thick, and “fuzzy.” The dentist will then thoroughly test for profound anesthesia by touching the gum with a sharp explorer and asking, “Do you feel this, or just pressure?” They will not proceed until the child indicates no sharp sensation. At this point, the child may be moved into the operative chair position, and the parent might be invited to step back to the waiting room, depending on the office policy and the child’s behavior.
Isolation: The Raincoat and the Dam
Once the tooth is profoundly asleep, the dentist must create a clean, dry, and isolated work environment. Saliva is full of bacteria and moisture that can ruin the bond of a modern white filling. There are two main methods for this.
The Cotton Roll and Isovac
For small, simple cavities, especially on front teeth or lower back teeth, the classic method of cotton rolls and an Isovac or Dry-Tip suction device is used. Cotton rolls are tucked into the cheek and under the tongue to soak up saliva. The Isovac is a soft, flexible plastic bite block that props the mouth open gently and continuously suctions away saliva. The child can rest their jaw on it, which reduces muscle fatigue during the procedure.
The Rubber Dam
For a larger cavity on a back molar, the gold standard of isolation is the rubber dam. This is a thin, stretchy sheet of latex or non-latex material. The dentist will use a small, hand-held punch to create a hole in the sheet and then select a tiny metal clamp. The clamp is placed around the tooth being worked on, just below the gum line. You will hear a gentle “click” as the clamp engages. The rubber sheet is then stretched over the clamp, and a frame holds the sheet taut outside the mouth. The tooth now pokes through the rubber sheet, completely isolated from the rest of the mouth. For a child, this might look and feel very strange. A good dentist will explain, “I am putting a special raincoat on your tooth so we can keep it very dry and clean.” The rubber dam prevents any water or filling debris from going down the child’s throat, and it eliminates the risk of the child accidentally swallowing a small instrument. It also forces the child to breathe through their nose, which can be calming if they are not congested.
Removing Decay: Modern, Minimally Invasive Approaches
With the tooth isolated, the removal of the “sugar bugs” begins. This is the step that has seen the most technological advancement away from the fearsome drill of the past. The guiding principle is minimally invasive dentistry: remove only the soft, infected dentin and preserve as much healthy tooth structure as possible.
The High-Speed Handpiece with Water Spray
For decay that has broken through the enamel, a high-speed handpiece is often the most efficient tool. It operates at over 300,000 revolutions per minute, using diamond or carbide burs. The critical difference from outdated dentistry is the use of copious water spray. The water keeps the tooth cool, preventing heat buildup that could damage the nerve inside the tooth. The dentist does not apply heavy pressure; they use a light, painting-like motion to gently outline the cavity and remove the outer layer of decayed enamel. The sound is a high-pitched whir, and the water spray creates a mist. The dental assistant will be right there with the high-volume suction to catch the water and debris.
The Slow-Speed Handpiece
Once the dentist reaches the deeper, softer decay close to the nerve, they often switch to a slow-speed handpiece. This has a much lower RPM and a gentler bur. Sometimes, the most inner layer of decay is removed entirely with hand instruments.
Hand Instruments and Caries-Detecting Dye
For the final and most delicate removal near the pulp, many pediatric dentists use small, spoon-shaped hand excavators. They scrape away the last of the infected dentin manually. This gives them incredible tactile control. They might also use a caries-detecting dye, a liquid that stains only the infected, non-viable dentin but leaves healthy, remineralizable dentin untouched. After dye application, they rinse, and any remaining stained tissue is removed, ensuring no hidden decay is left behind. This combination ensures a cavity is perfectly cleaned while preserving the maximum amount of your child’s natural tooth.
The Filling: Material Selection and Placement
With the cavity clean and perfectly contoured, the dentist is ready to rebuild the tooth. For a child, the material choice is almost always a tooth-colored composite resin, though in very specific situations, other materials are considered.
Composite Resin: The Standard of Care
Composite resin is the material of choice for its superior bonding and aesthetics. The placement is a multi-step chemical bonding process. First, the clean cavity is etched with a blue gel containing phosphoric acid for about 15 to 20 seconds. This creates microscopic pores in the enamel and dentin, like a honeycomb, for the bonding agent to flow into. The etchant is rinsed away thoroughly, and the cavity is dried again, leaving a frosty-white, chalky appearance. Next, a liquid primer and bonding agent is painted onto the prepared surfaces and gently air-thinned. A bright blue curing light is held over the tooth for about 20 seconds to polymerize and set this bond. This creates a micromechanical and chemical link between the tooth and the filling material.
Now comes the actual composite, which comes in a small syringe or compule. It is a putty-like, tooth-colored material. The dentist will place it into the cavity in small, carefully packed increments. Layering is crucial. Composite shrinks slightly when it hardens. By placing and curing it in small, wedge-shaped layers, the dentist controls the direction of the shrinkage and reduces the stress on the tooth wall, which prevents post-operative sensitivity. Each layer is exposed to the bright blue light for 20 to 40 seconds and instantly transforms from a soft putty to a hard, durable surface. The dentist sculpts the final layer to rebuild the exact anatomy of the tooth—the cusps, grooves, and slopes.
Glass Ionomer: A Valuable Option
In certain situations, a different material called glass ionomer is a superb choice. This material is not as strong or aesthetic as composite for a large chewing surface, but it has a unique and powerful advantage: it releases fluoride over time. It is often used for small cavities between teeth, on root surfaces, or in very young, uncooperative children where absolute dryness for composite is impossible to achieve. Glass ionomer chemically bonds to the tooth without needing a separate bonding agent, and it tolerates a slightly moist environment. It is a faster, more forgiving material that actively fights future decay.
Shaping, Bite Adjustment, and Polishing
The filling is now in place, but it is a rough, unpolished block. The functional artistry begins. The dentist uses a series of fine, diamond or carbide finishing burs on the handpiece to carefully carve the filling to match the tooth’s natural anatomy. They will create the deep grooves and rounded cusps that allow the child to chew effectively.
The critical step of bite adjustment follows. The dentist removes the cotton rolls and any rubber dam and asks the child to “bite down on this special paper.” Articulating paper, a thin strip coated with ink, is placed between the teeth. When the child bites and grinds their teeth, the paper marks the high spots on the new filling with a bright color. The dentist then uses a handpiece to gently remove those specific colored points. The child bites again, and the process is repeated until the bite feels completely natural and the filling is not hitting prematurely. A filling that is left “high” will cause discomfort, tooth sensitivity, and even fracture over time. For a child, the dentist will explain, “I need you to bite on my red crayon paper so we can make sure your teeth fit together just right.”
Finally, the restoration is polished to a smooth, glassy finish. Special silicone-impregnated polishing points and cups with fine diamond paste are run over the filling. A smooth surface is harder for bacteria and plaque to stick to and feels much more comfortable and natural to the tongue. The final step is a thorough rinse and a squirt of water from the air-water syringe to clean away all the polishing debris.
Post-Treatment Care and Observations
The appointment concludes with clear, reassuring instructions for both you and your child. The dentist will explain that the child’s lip, cheek, and tongue will remain numb for one to two hours. This is the most critical post-operative instruction: the child must not chew, bite, suck, or scratch their numb lip or cheek. A numb, puffy lip is a strange sensation, and children will often bite it out of curiosity, causing significant trauma that swells up painfully after the anesthetic wears off. Watch your child like a hawk during this period. Soft foods like yogurt, smoothies, or apple sauce are perfect if they are hungry, but it is often safest to wait until the numbness is completely gone before offering any solid food.
It is completely normal for the gums around the filling site to feel slightly sore for a day or two from the rubber dam clamp or the retraction of the gum tissue. The tooth itself should feel zero sharp sensitivity once the numbness wears off. If your child complains of sharp pain when biting on a specific spot, the filling might need a simple, quick bite adjustment. Contact your dentist, and they will see you for a brief, no-charge adjustment. In the following days, reinforce the normalcy of the restored tooth. Compliment your child on their bravery and on their “strong, shiny, white tooth.” Begin normal brushing and flossing the same evening, encouraging gentle but thorough cleaning right up to the gum line to keep the area perfectly plaque-free.
Conclusion
A dental filling on a child is a carefully sequenced procedure built on trust, comfort, and precision. It begins with gentle communication and truly painless numbing, progresses through isolated and minimally invasive decay removal, and concludes with a meticulously bonded, shaped, and polished tooth-colored restoration. Knowing each step eliminates mystery and fear, transforming the experience into a positive, health-building visit that protects your child’s smile for years to come.
Frequently Asked Questions
Will my child feel any pain during the procedure?
When done correctly, no. The layered numbing process—topical gel followed by a slow, controlled injection—ensures the tooth is profoundly numb before any work begins. Children typically report feeling vibration and water mist, but not pain. If a child ever raises a hand indicating discomfort, the dentist stops immediately and administers more anesthetic.
How long will the white filling last on my child’s baby tooth?
A well-placed composite filling on a baby tooth is designed to last the functional lifetime of that tooth, which may be 5 to 8 years. However, a baby tooth is smaller, and the enamel is thinner, so fillings can occasionally chip or need repair, particularly if a child has a heavy bite or grinding habit. Good hygiene and regular checkups are essential for longevity.
What if my child is too anxious or young to cooperate?
Pediatric dentists have a full spectrum of behavior management techniques. This starts with gentle communication and nitrous oxide (laughing gas) for mild anxiety. For very young children or those with high dental fear, special needs, or extensive treatment, the dentist may recommend conscious oral sedation or general anesthesia in a controlled, safe operating room setting.
Is it really necessary to fill a baby tooth that will just fall out?
Yes, it is critically important. Baby teeth hold the space for permanent teeth. A cavity left untreated will grow, causing infection, pain, and potential damage to the developing permanent tooth beneath it. Early loss of a baby tooth due to decay often leads to space loss and the need for orthodontic intervention later.
Additional Resource:
For more educational resources on children’s dental health, visit the American Academy of Pediatric Dentistry’s parent resource page at www.mychildrensteeth.org.
Disclaimer: This article is for informational and educational purposes only and does not replace professional dental advice. Always consult with a qualified pediatric dentist for a proper diagnosis and a treatment plan tailored to your child’s specific needs.